


Server Manager GUI starts automatically when you log in as a default window.
Click Tools, and then click Windows Deployment Services to launch the Windows Deployment Services MMC-snap (or console). Or you can start WDS from the Start Menu.
In the left pane of the Windows Deployment Services MMC snap-in, expand the list of servers.
Right-click the desired server, click Configure Server.
On the Before you begin page, click Next.
Right-click the desired server, click Configure Server.
On the Before you begin page, click Next.
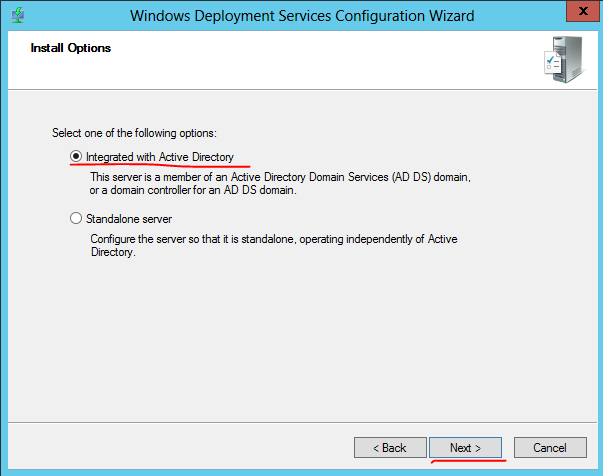
On the Install options page, choose Integrated with Active Directory.
On the Remote Installation Folder Locations page, choose the default path or enter your own path to the remote installation folder. Click Next.
Note: If your server is running as a DHCP Server, you will see the Proxy DHCP Server page.
Select Do not listen on DHCP and DHCPv6 ports and Configure DHCP options for Proxy DHCP. Click Next.
On the PXE Server Initial Settings page, choose desired option to define which client computers this server will respond to. Click Next. This will complete the configuration of Windows Deployment Services.
When the configuration is completed, click Finish.
If you want to modify any of the settings of the server, right-click the server in the MMC-snap in, and click Properties.


0 comments:
Post a Comment